

I did a simple bodice and added the gathered skirt and a matching bias tape ribbon. I really think it turned out great. I've added a pattern and tutorial below if you'd like to make one too!
Supplies Needed: 140-180 yards (depending on size) of sport weight yarn, I Hook (5.5 mm), 3/4 of a yard of cotton woven fabric (a vintage pillow case would also work!), matching sewing thread, sewing needle, sewing machine, bias tape maker (optional), iron.
Sizing, Yarn, and Fabric Requirements:
12-24 months: Chest: 23 inches, Yarn: 140 yards, Fabric: 3/4 yard, Skirt piece: 40 in by 20 in
2T-4T: Chest: 24 inches, Yarn: 160 yards, Fabric: 3/4 yard, Skirt piece: 42 in by 22 in
4-6: Chest: 26 inches, Yarn 180 yards, Fabric: 3/4 yard, Skirt piece: 42 in by 23 in
Make Yoke:
Yarn: Rowan Wool Cotton 4 ply.
Hook and Gauge: I used an I Hook (5.5 mm). Gauge is not critical, but for a yoke that looks like mine, 19 hdcf (see stitch guide) and 19 rows is a 4 inch square.
Stitch Guide and Terms Used:
Ch: Chain
Dc: Double crochet
Fsc: Foundation Single Crochet (ch 2, insert hook into 2nd ch from hook, pull up loop, yo, pull through one loop, [foundation chain made] yo, pull through two loops, [fsc made]). To make the next fsc, insert hook into the foundation chain of the previous fsc, pull up a loop, yo, pull through one loop, yo, pull through two loops.
Hdc: Half double crochet
Hdcf: Half double crochet in the front bar (yo, pull up a loop through the front bar of the next hdc (not the front loop, the bar in front of the front loop). See video tutorial below.
Sc: Single crochet
Sl: Slip
St: Stitch
Pattern:
Round 1: Fsc 64 times, join with sl st to first fsc of round. (64)
Round 2: Ch
1, 1 hdc in same st and next 7 st (hdc, ch 1, hdc) in next st, 1 hdc in next 14 st, (hdc,
ch 1, hdc) in next st, 1 hdc in next 16 st, (hdc, ch 1, hdc) in next st, 1
hdc in next 14 st, (hdc, ch 1, hdc) in next st, 1 hdc in next 8 st, sl st to
first hdc of round to join. (68)
Round 3: Ch
1, turn, [1 hdcf in each stitch to next ch 1 space, (hdc, ch 1, hdc) in next ch 1
space] 4 times, 1 hdcf in each st to end of round, sl st to first hdcf of round
to join. (76)
Repeat Round 3 until longer edge of piece measures half the chest measurement (see sizing chart above). Fasten off.


Fold the shorter sides of the yoke in half to form the armholes.
Round 1: Join yarn
in ch 1 spaces of 2 corners that form first armhole, work 1 sc through both
corners, work 1 sc in each st to next ch 1 space, work 1 sc through both corners forming 2nd armhole, work 1 sc in each st to end of round, sl st in first sc of round to join. Right side.
Round 2: Ch 1, work 1 dc in each st around, sl st in first dc of round to join.
Round 3-4: Ch 1, work 1 sc in each st around, sl st in first sc of round to join.
Fasten off and weave in your ends. Set yoke aside.
Make Skirt
Step 1: Cut your fabric to the specified dimensions based on the size you are making (see sizing chart above).

Your piece of fabric should look more or less like this:

Step 2: Finish raw edges. Zig-zag, overlock or serge the short edges and top edge of your fabric to prevent fraying. You can also cut those sides with pinking shears if you'd prefer.

Step 3: With right sides together, sew the short edges of your fabric together using 3/8 seam allowance.

Step 4: Press seam open.

Step 5: Mark the top edge of the fabric in fourths. Make a mark at the two sides and front and back of the top edge of your fabric with a washable marker or tailor's chalk.

Step 6: Gather the top edge of your fabric. There are many ways to do this. The most common way is to sew two rows of basting stitches and gently pull your bobbin threads. I like to do this by hand or to zig zag over a long length of bobbin thread. You may also buy a special gathering presser foot for your machine.
Attach Skirt to Yoke
Step 1: Flip yoke inside out.
Step 2: Fit the skirt over the yoke and adjust your gathers so that your markings match the front, back and sides of the yoke. Pin in place.


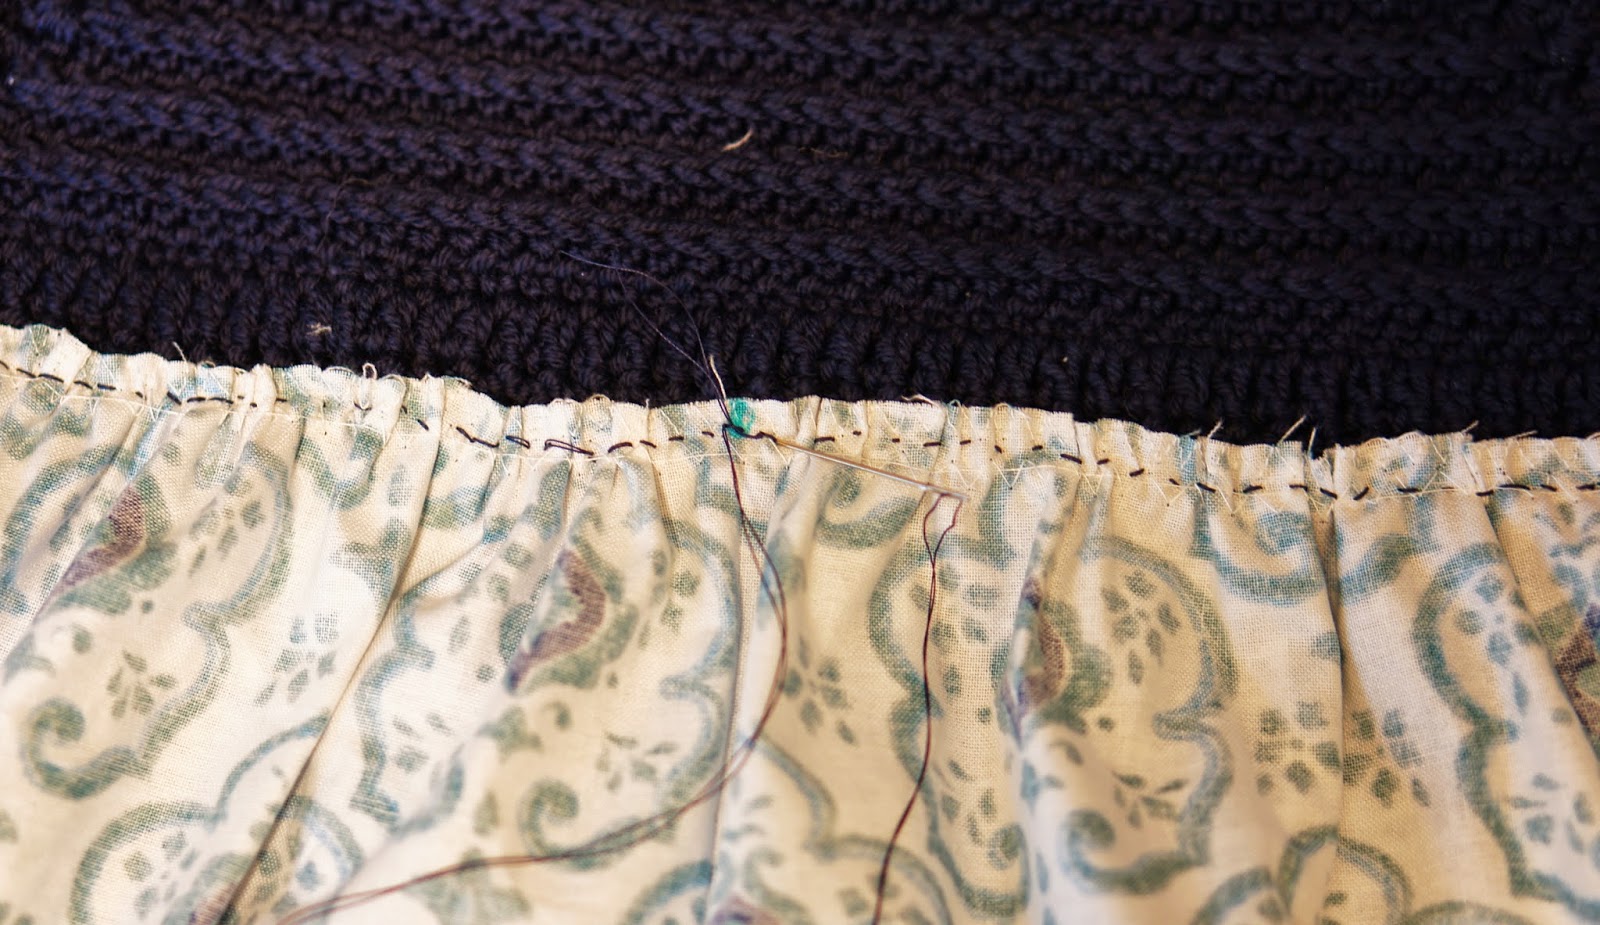
Step 3: Using thread that matches the color of your yarn, hand stitch the yoke in place working your stitches in the rows of single crochet at the bottom of the yoke. I used a double strand of quilting thread and back stitched around for extra strength.


Step 4 (Optional): Flip your dress right side out. Hang it up and admire it. You may even want to jump up and down and clap and say OMG, I can't believe how great this is coming out!!!

Make Bias Tape Ribbon:
Step 1: Cut a 2 inch strip of fabric from selvage to selvage (or approximately 42 inches long).
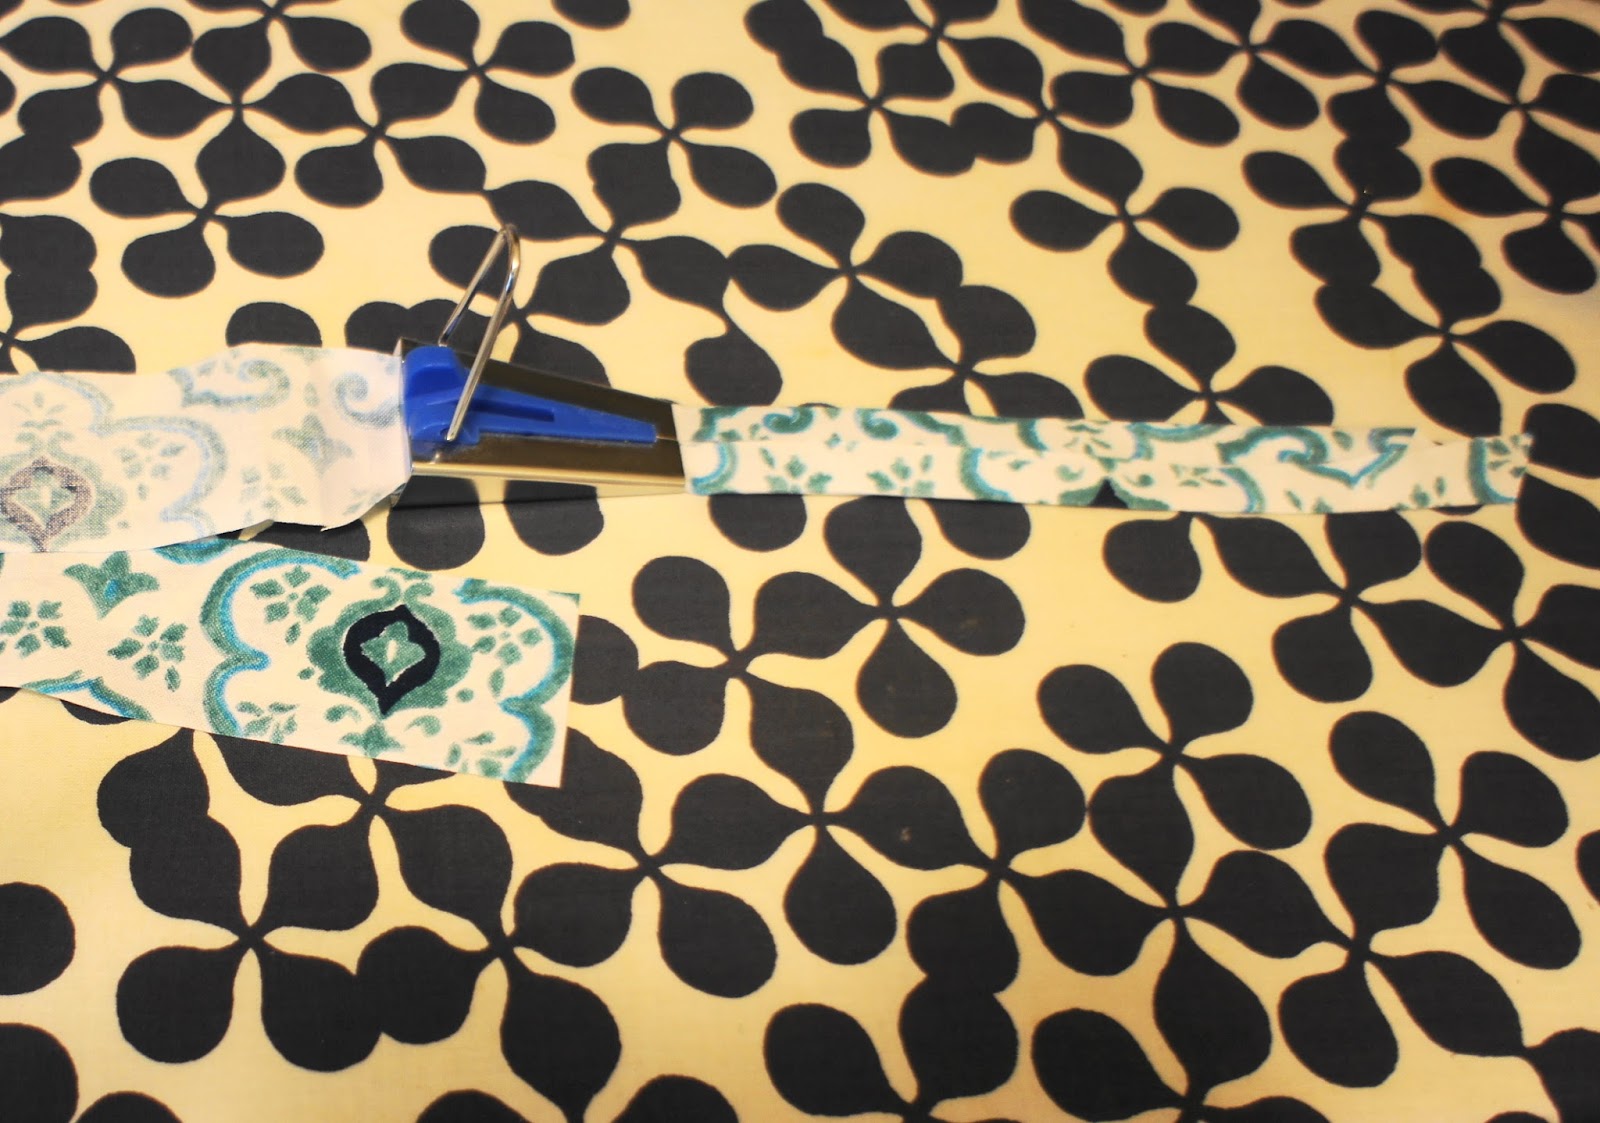
Step 2: Use a bias tape maker and an iron to press the edges of the strip towards the center. If you don't have a bias tape maker you can press the strip in half lengthwise, then fold the edges towards the center and press again. However, I highly recommend getting a bias tape maker! It is super cheap and makes the job so quick and easy.


Step 3: Unfold the short edges, tuck in the raw edges, and refold.

Step 4: Fold piece in half again and stitch about 1/8 of an inch away from the 2 folded edges.


Step 1: Cut your fabric to the specified dimensions based on the size you are making (see sizing chart above).

Your piece of fabric should look more or less like this:

Step 2: Finish raw edges. Zig-zag, overlock or serge the short edges and top edge of your fabric to prevent fraying. You can also cut those sides with pinking shears if you'd prefer.

Step 3: With right sides together, sew the short edges of your fabric together using 3/8 seam allowance.

Step 4: Press seam open.

Step 5: Mark the top edge of the fabric in fourths. Make a mark at the two sides and front and back of the top edge of your fabric with a washable marker or tailor's chalk.

Step 6: Gather the top edge of your fabric. There are many ways to do this. The most common way is to sew two rows of basting stitches and gently pull your bobbin threads. I like to do this by hand or to zig zag over a long length of bobbin thread. You may also buy a special gathering presser foot for your machine.
Attach Skirt to Yoke
Step 1: Flip yoke inside out.
Step 2: Fit the skirt over the yoke and adjust your gathers so that your markings match the front, back and sides of the yoke. Pin in place.


Step 3: Using thread that matches the color of your yarn, hand stitch the yoke in place working your stitches in the rows of single crochet at the bottom of the yoke. I used a double strand of quilting thread and back stitched around for extra strength.

Step 4 (Optional): Flip your dress right side out. Hang it up and admire it. You may even want to jump up and down and clap and say OMG, I can't believe how great this is coming out!!!

Make Bias Tape Ribbon:
Step 1: Cut a 2 inch strip of fabric from selvage to selvage (or approximately 42 inches long).
Step 2: Use a bias tape maker and an iron to press the edges of the strip towards the center. If you don't have a bias tape maker you can press the strip in half lengthwise, then fold the edges towards the center and press again. However, I highly recommend getting a bias tape maker! It is super cheap and makes the job so quick and easy.

Step 3: Unfold the short edges, tuck in the raw edges, and refold.

Step 4: Fold piece in half again and stitch about 1/8 of an inch away from the 2 folded edges.

Step 5: Weave ribbon in and out of th dc row of bodice as desired and tie a bow. I put the bow off center in the front, but I think it would also look cute in the back.

ALMOST DONE!
Hem Dress
Step 1: Press the bottom edge of skirt 1/4 inch and then 1 inch towards wrong side.


Step 2: Sew around the bottom about 7/8 of an inch from the bottom edge.

You are done!!!
Woo Hoo!!!


